No edit summary |
No edit summary |
||
| (16 intermediate revisions by 4 users not shown) | |||
| Line 7: | Line 7: | ||
|- |
|- |
||
|class="content2 separator2 frontpageDynamicSection" | |
|class="content2 separator2 frontpageDynamicSection" | |
||
| − | {{ |
+ | {{Tabs:GameInfoPortal|This=8}} |
|- |
|- |
||
|class="content2 separator2 frontpageDynamicSection" style="padding:0.5%" | |
|class="content2 separator2 frontpageDynamicSection" style="padding:0.5%" | |
||
| − | <div class="center" style="display:inline-block;>{{ |
+ | <div class="center" style="display:inline-block;>{{Box|start}} |
[[Image:AllRandomSummonersRiftLogo.jpg|340x191px|link=All Random Summoner's Rift]]<br>[[All Random Summoner's Rift]] |
[[Image:AllRandomSummonersRiftLogo.jpg|340x191px|link=All Random Summoner's Rift]]<br>[[All Random Summoner's Rift]] |
||
| − | {{ |
+ | {{Box|break}} |
[[Image:AscensionLogo.jpg|340x191px|link=Ascension (Game Mode)]]<br>[[Ascension (Game Mode)|Ascension]] |
[[Image:AscensionLogo.jpg|340x191px|link=Ascension (Game Mode)]]<br>[[Ascension (Game Mode)|Ascension]] |
||
| − | {{ |
+ | {{Box|break}} |
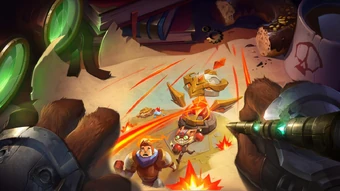
[[Image:BlackMarketBrawlersLogo.jpg|340x191px|link=Black Market Brawlers (Game Mode)]]<br>[[Black Market Brawlers (Game Mode)|Black Market Brawlers]] |
[[Image:BlackMarketBrawlersLogo.jpg|340x191px|link=Black Market Brawlers (Game Mode)]]<br>[[Black Market Brawlers (Game Mode)|Black Market Brawlers]] |
||
| − | {{ |
+ | {{Box|break}} |
[[Image:DarkStarSingularityLogo.jpg|340x191px|link=Dark Star - Singularity]]<br>[[Dark Star - Singularity]] |
[[Image:DarkStarSingularityLogo.jpg|340x191px|link=Dark Star - Singularity]]<br>[[Dark Star - Singularity]] |
||
| − | {{ |
+ | {{Box|break}} |
[[Image:DefinitelyNotDominionLogo.jpg|340x191px|link=Definitely Not Dominion]]<br>[[Definitely Not Dominion]] |
[[Image:DefinitelyNotDominionLogo.jpg|340x191px|link=Definitely Not Dominion]]<br>[[Definitely Not Dominion]] |
||
| − | {{ |
+ | {{Box|break}} |
[[Image:DoomBotsLogo.jpg|340x191px|link=Doom Bots]]<br>[[Doom Bots]] |
[[Image:DoomBotsLogo.jpg|340x191px|link=Doom Bots]]<br>[[Doom Bots]] |
||
| − | {{ |
+ | {{Box|break}} |
[[Image:HexakillLogo.jpg|340x191px|link=Hexakill]]<br>[[Hexakill]] |
[[Image:HexakillLogo.jpg|340x191px|link=Hexakill]]<br>[[Hexakill]] |
||
| − | {{ |
+ | {{Box|break}} |
[[Image:HexakillTTLogo.jpg|340x191px|link=Hexakill: Twisted Treeline]]<br>[[Hexakill: Twisted Treeline]] |
[[Image:HexakillTTLogo.jpg|340x191px|link=Hexakill: Twisted Treeline]]<br>[[Hexakill: Twisted Treeline]] |
||
| − | {{ |
+ | {{Box|break}} |
[[Image:LegendofthePoroKingLogo.jpg|340x191px|link=Legend of the Poro King]]<br>[[Legend of the Poro King]] |
[[Image:LegendofthePoroKingLogo.jpg|340x191px|link=Legend of the Poro King]]<br>[[Legend of the Poro King]] |
||
| − | {{ |
+ | {{Box|break}} |
[[Image:NemesisDraftLogo.jpg|340x191px|link=Nemesis Draft]]<br>[[Nemesis Draft]] |
[[Image:NemesisDraftLogo.jpg|340x191px|link=Nemesis Draft]]<br>[[Nemesis Draft]] |
||
| − | {{ |
+ | {{Box|break}} |
[[Image:NexusSiegeLogo.jpg|340x191px|link=Nexus Siege]]<br>[[Nexus Siege]] |
[[Image:NexusSiegeLogo.jpg|340x191px|link=Nexus Siege]]<br>[[Nexus Siege]] |
||
| − | {{ |
+ | {{Box|break}} |
[[Image:OneforAllLogo.jpg|340x191px|link=One for All]]<br>[[One for All]] |
[[Image:OneforAllLogo.jpg|340x191px|link=One for All]]<br>[[One for All]] |
||
| − | {{ |
+ | {{Box|break}} |
[[Image:OneforAllMirrorLogo.jpg|340x191px|link=One for All: Mirror Mode]]<br>[[One for All: Mirror Mode]] |
[[Image:OneforAllMirrorLogo.jpg|340x191px|link=One for All: Mirror Mode]]<br>[[One for All: Mirror Mode]] |
||
| − | {{ |
+ | {{Box|break}} |
[[Image:SnowdownShowdownLogo.jpg|340x191px|link=Snowdown Showdown]]<br>[[Snowdown Showdown]] |
[[Image:SnowdownShowdownLogo.jpg|340x191px|link=Snowdown Showdown]]<br>[[Snowdown Showdown]] |
||
| − | {{ |
+ | {{Box|break}} |
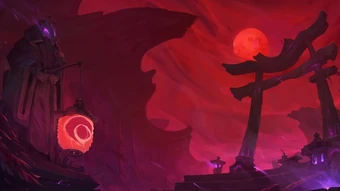
[[Image:TheHuntoftheBloodMoonLogo.jpg|340x191px|link=The Hunt of the Blood Moon]]<br>[[The Hunt of the Blood Moon]] |
[[Image:TheHuntoftheBloodMoonLogo.jpg|340x191px|link=The Hunt of the Blood Moon]]<br>[[The Hunt of the Blood Moon]] |
||
| − | {{ |
+ | {{Box|break}} |
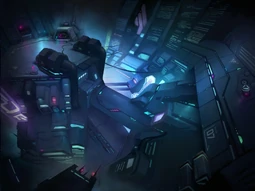
| − | [[Image: |
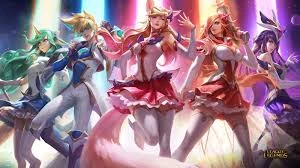
+ | [[Image:StarGuardianlogo.jpg|340x191px|link=Star Guardian]]<br>[[Star Guardian]] |
| − | {{ |
+ | {{Box|break}} |
| − | [[Image: |
+ | [[Image:OVERCHARGELogo.png|340x191px|link=OVERCHARGE (Game Modes)]]<br>[[OVERCHARGE (Game Mode)|OVERCHARGE]] |
| − | {{ |
+ | {{Box|break}} |
| + | [[Image:OdysseyLogo.jpg|340x191px|link=Odyssey (Game Modes)]]<br>[[Odyssey (Game Mode)|Odyssey]] |
||
| + | {{Box|break}} |
||
| + | [[Image:NexusBlitzLogo.jpg|340x191px|link=NexusBlitz]]<br>[[Nexus Blitz]] |
||
| + | {{Box|break}} |
||
| + | [[Image:Teamfight TacticsLogo.jpg|340x191px|link=Teamfight Tactics]]<br>[https://teamfighttactics.gamepedia.com/Teamfight_Tactics_Wiki Teamfight Tactics] |
||
| + | {{Box|break}} |
||
[[Image:UltraRapidFireLogo.jpg|340x191px|link=Ultra Rapid Fire]]<br>[[Ultra Rapid Fire]] |
[[Image:UltraRapidFireLogo.jpg|340x191px|link=Ultra Rapid Fire]]<br>[[Ultra Rapid Fire]] |
||
| − | {{ |
+ | {{Box|break}} |
| + | [[Image:Clash Logo.jpg|340x191px|link=Clash]]<br>[[Clash]] |
||
| + | {{Box|end}} |
||
</div> |
</div> |
||
|} |
|} |
||
Latest revision as of 06:01, 24 August 2020
| League of Legends Portal |
|---|
|
|